Managing Setlists
Create, arrange, and customize your performance flow without touching your REAPER timeline.
Creating a Setlist
Click the Setlists button in the main navigation and select New Setlist. Give it a name and optional description.
Note: Setlists are saved directly inside your REAPER project file. They travel with your session—no extra files required.
Interface Legend
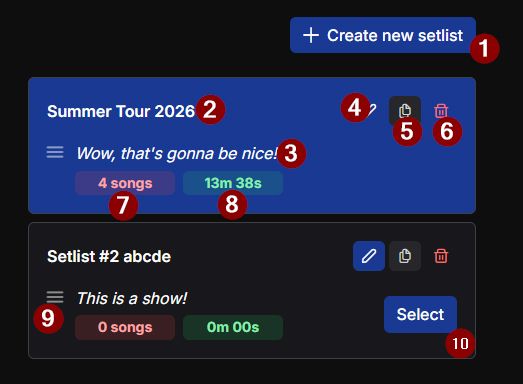
1Create new setlist button
2Setlist name
3Setlist description
4Edit button (opens details modal)
5Duplicate setlist button
6Delete setlist button
7Number of songs in setlist
8Total duration display
9Drag and drop reorder handle
10Select button to switch active setlist
The Setlist Editor
- Add Songs: Use the dropdown to select Regions detected from your project.
- Arrange: Drag and drop songs to change the order. This is non-destructive to REAPER.
- End-of-Song Actions: Set whether REAPER should stop, or continue to the next song automatically.
Interface Legend
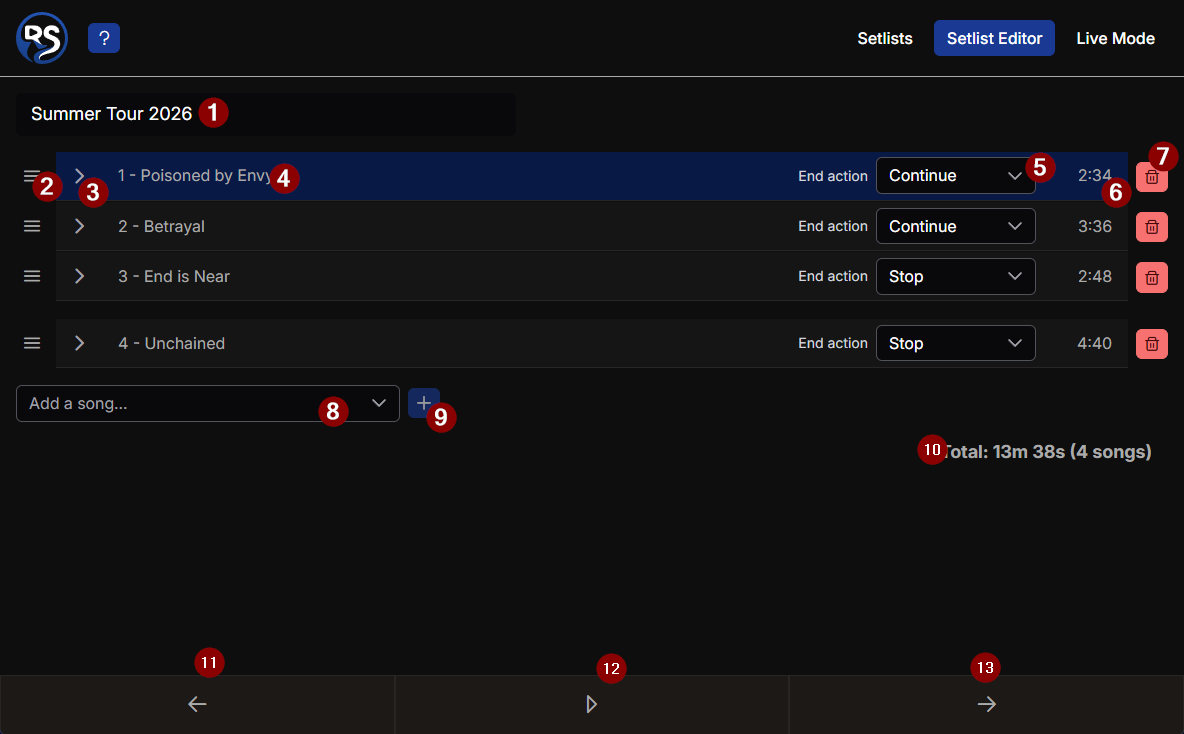
1Setlist name
2Drag and drop reorder handle
3Button to open the song sections (markers)
4Song position number with the song title
5End of song actions dropdown
6Song duration display
7Button to delete this song from the setlist
8Add a song dropdown selection
9Button to add the selected song to the setlist
10Total setlist duration with the number of songs
11Navigate to the previous song
12Play/Stop toggle button
13Navigate to the next song